Many years ago I pre-ordered a Tesla Model 3 when they were first announced. I didn’t go through with the purchase in the end and now that I finally have one I massively regret that decision. Best car I’ve ever had.
So this post is serving three purposes really.
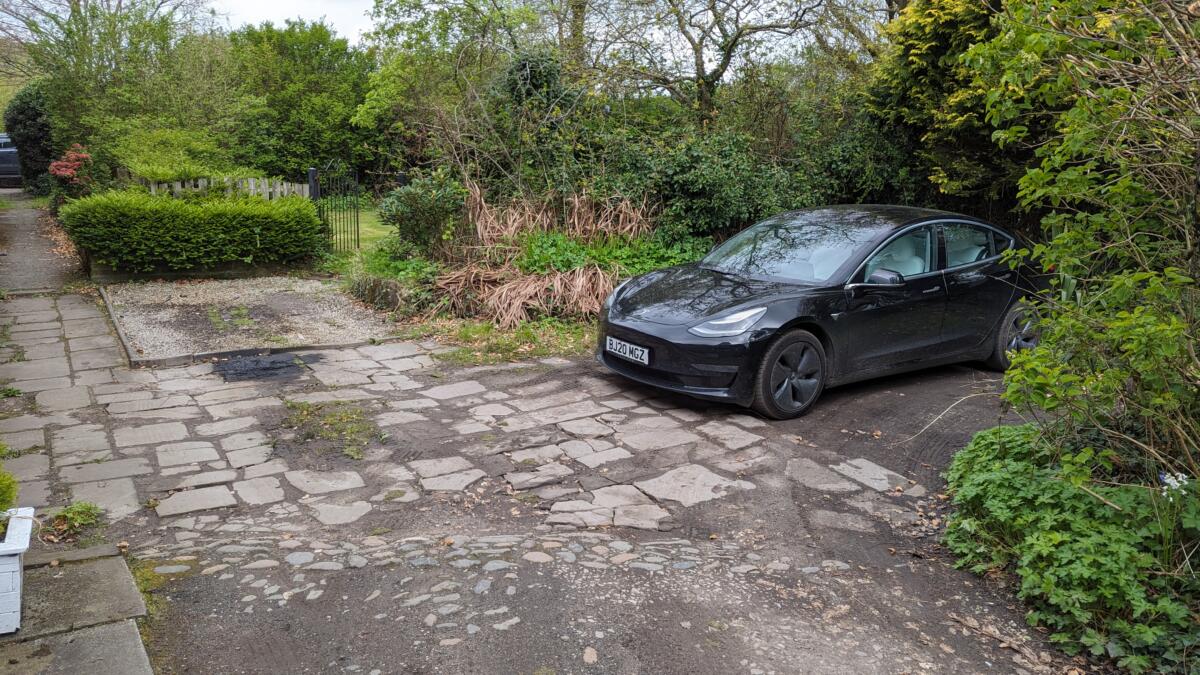
Purpose 1 : Yes, we finally have a model 3. Long Range AWD
Purpose 2 : You can see the oil patch left behind by the Porsche that I was going to keep but ended up trading it in to get rid of the oil leak problem.
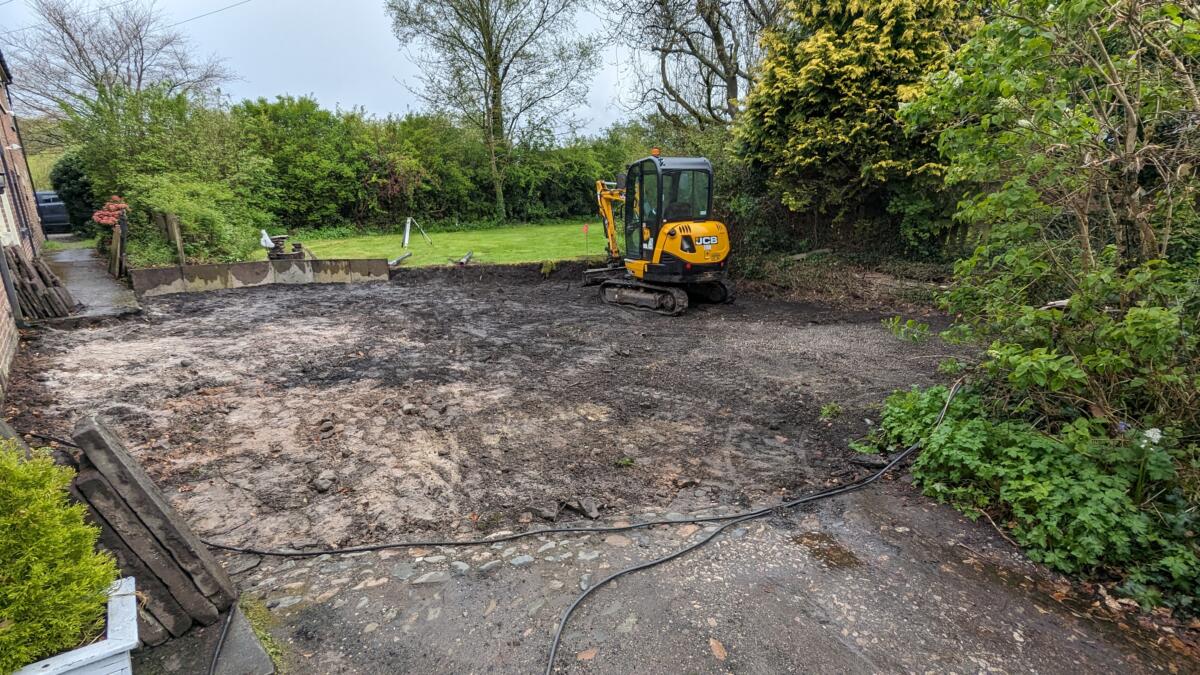
Purpose 3 : You can see what my “driveway” was like yesterday. Today it looks like this…
Hopefully tomorrow it will look a lot better and next week it should be done. Due to a possible “breakdown in communications” between me and the builders they dug up a bit too much of my garden which I’m a little sad about. It’s my fault, I should have got off my arse, bought a tin of that spray paint to mark out the ground and drawn a line exactly where I wanted it. It’ll be fine. I’ll work something out.
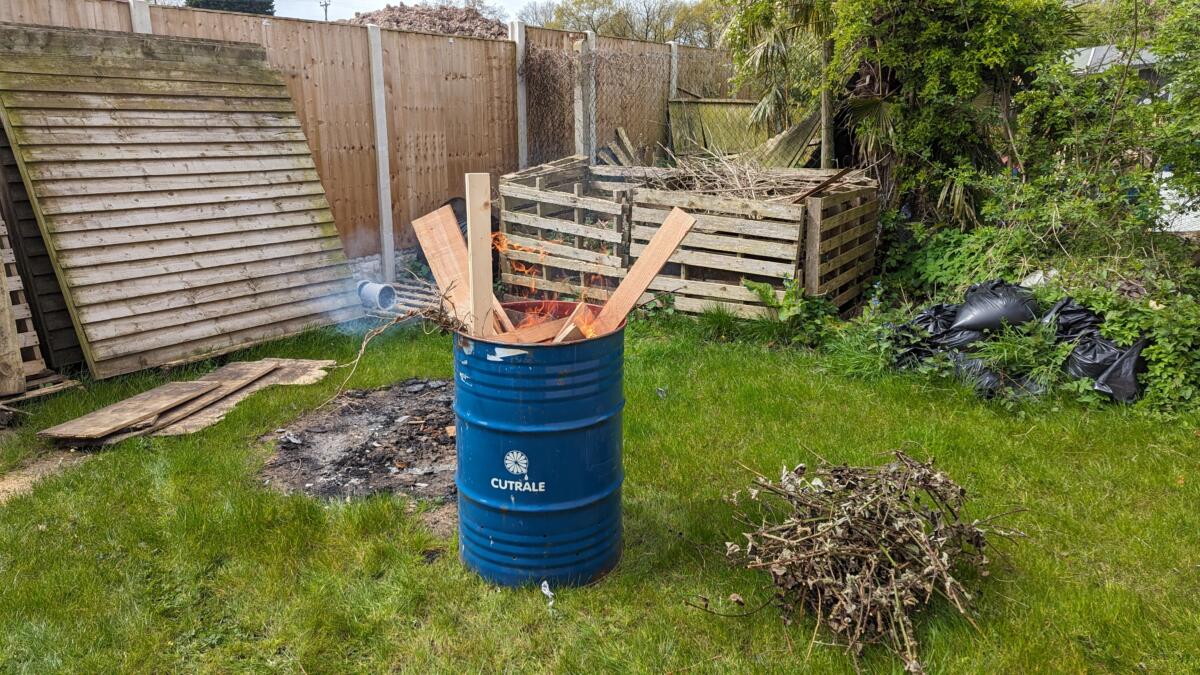
Anybody that knows me even slightly will know that I like a good fire. Nearly burned my parents’ house down when I was about 6 but that’s a whole different story. You may also remember I accidentally burned down my woodstore too, but that was in a previous post
Turns out I’ve been doing it all wrong. I was out with Mr Simkiss a while ago and he mentioned that he’d been having a near constant fire in a 55 gallon drum. I had a 55 gallon drum sitting about doing nothing so I put some air holes in the bottom, filled it with wood and a little petrol and off we went.
So now I can reseed that bit of ground next to my oil drum and I only have to worry about a small bit of ground getting wrecked when I have a fire. Genius. Should have done it years ago…I’d still have a wood store.
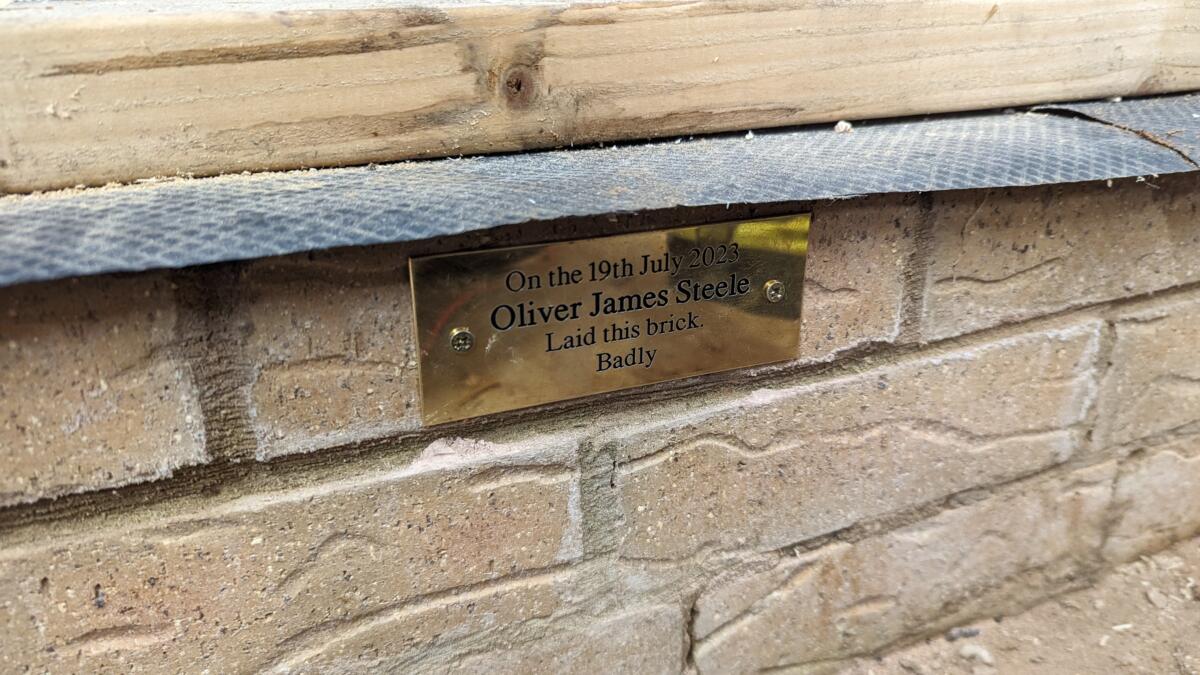
Whilst I was laying the bricks for my workshop in a spectacularly bad manner, Oliver came along to “give me a hand”. He laid one brick. One! It was this one.
I wanted to make some rudimentary window frames on my workshop. Since I heinously miscalculated the amount of really quite expensive Larch I would need I managed to end up with quite a bit leftover. The Larch that I have leftover is currently being used as a temporary workbench and I have plans to build a wheelie bin enclosure with it, a pet shelter in the garden and the sides and maybe roof for a wood store. Yeah, I really have that much left over!
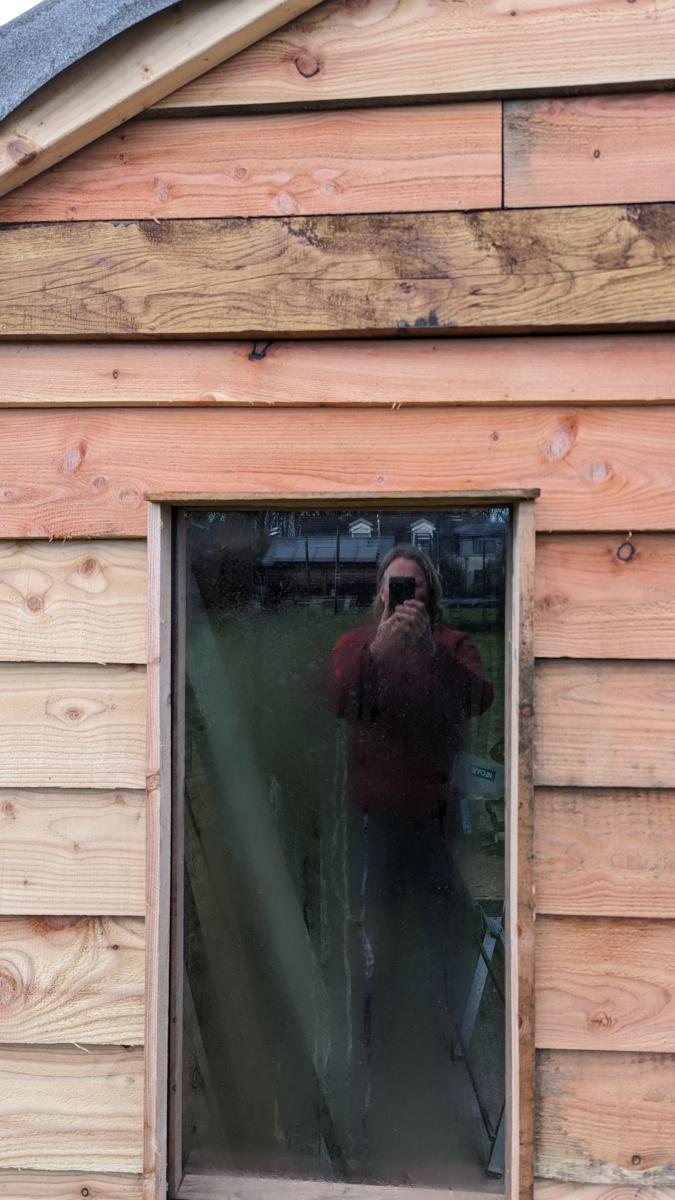
But in the meantime, I thought I’d use it for my “window frames”. The only thing left was deciding to whether or not to have a top framey bit hangovery bit. So I tried one of each.
Sans hangover
The one above is kinda square and flush. The one below has a little hangover flourish at the top. It’s also the design that we all prefer so I’ll be changing the one above…when things get a bit warmer.
ummm avec hangover…maybe. My French is pretty rubbish
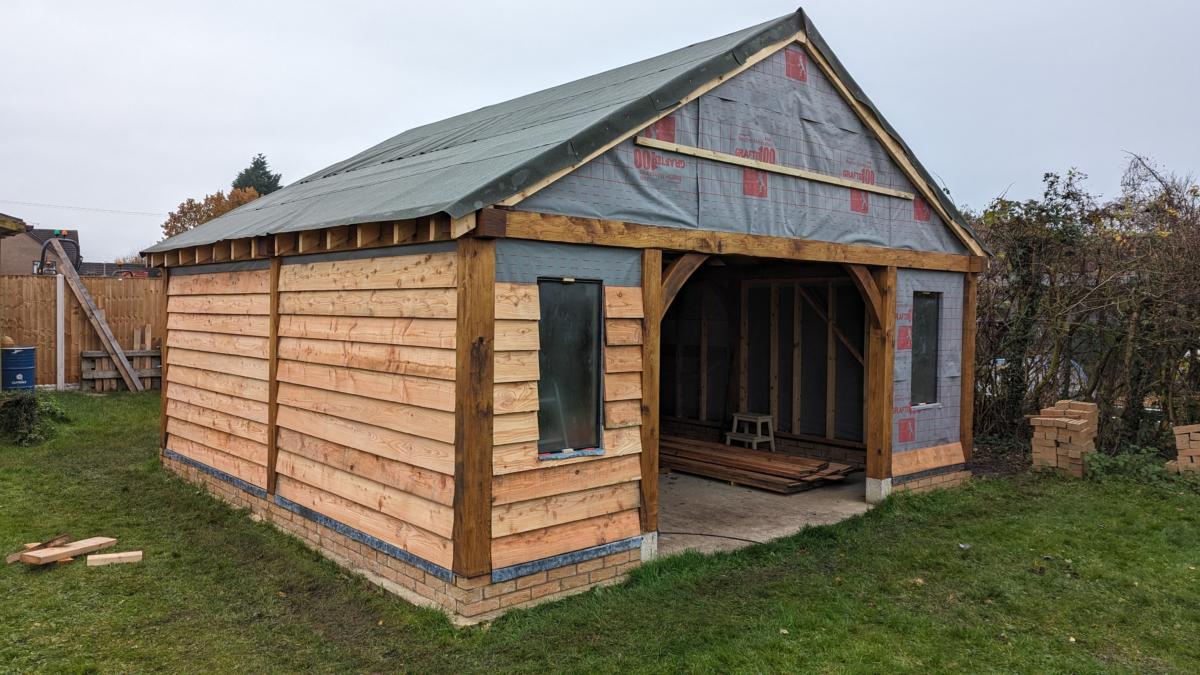
Since the weather is starting to cool down quite significantly in the UK it was a final rush to get the workshop weatherproof, or watertight if you prefer.
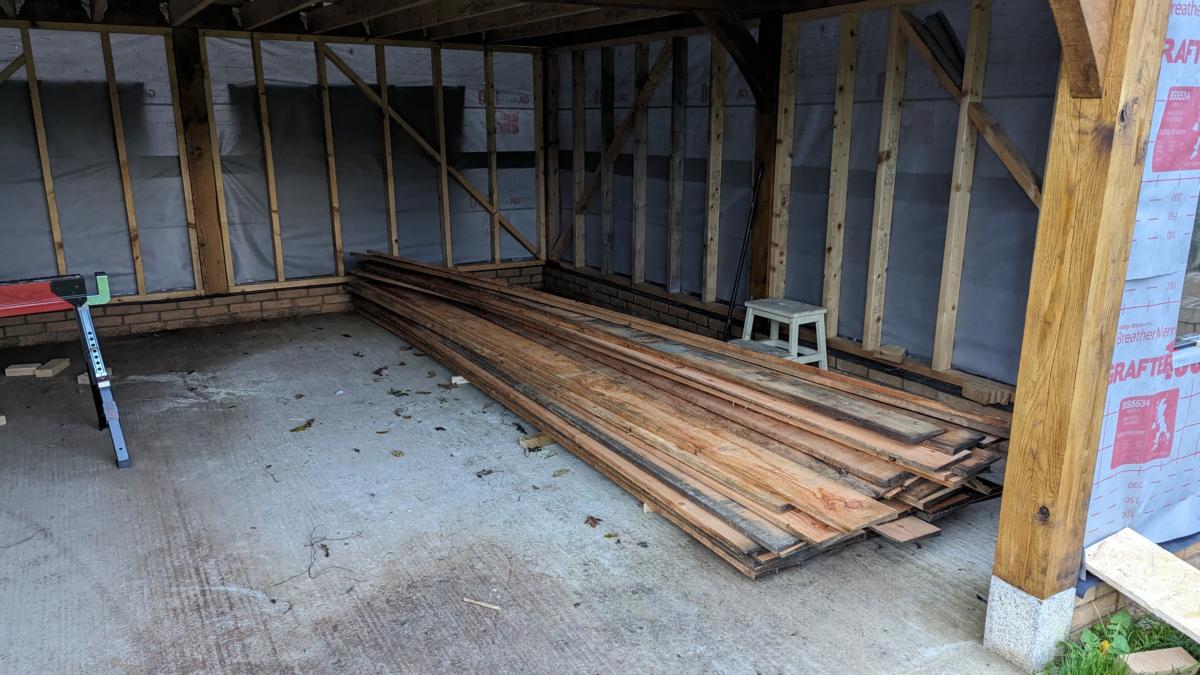
The cladding turned up about a week earlier than expected and it coincided with some good weather in the UK so I dropped pretty much everything in my life and cracked on with it.
This is what about £1000 worth of cladding looks like.
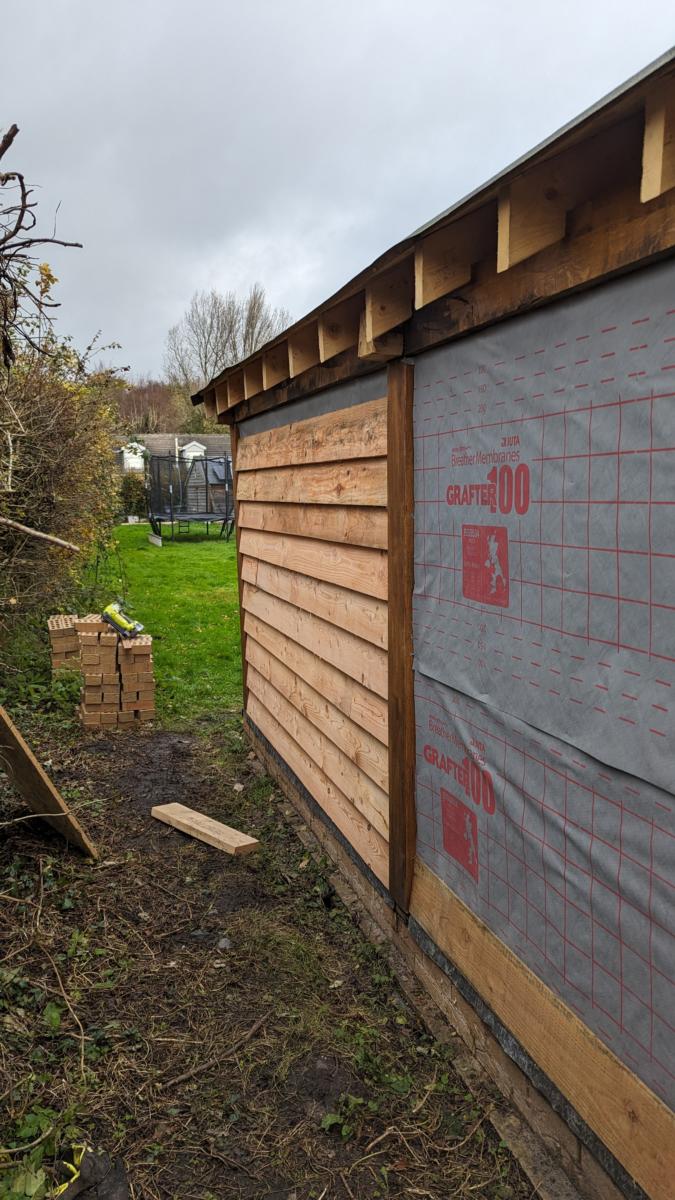
Putting up 3m lengths of cladding on the walls on my own was a bit tricky. I ended up utilising some 4×2 of various lengths to act like a second person helping me. It was slow going at first but once into the groove it worked out pretty well. The first “panel” that I clad…
… probably took me about 3 hours. By the time I got to the last panel it took me about 40 minutes. I always start anything new on this “hidden” side by the bushes so I can make all my mistakes well out of view.
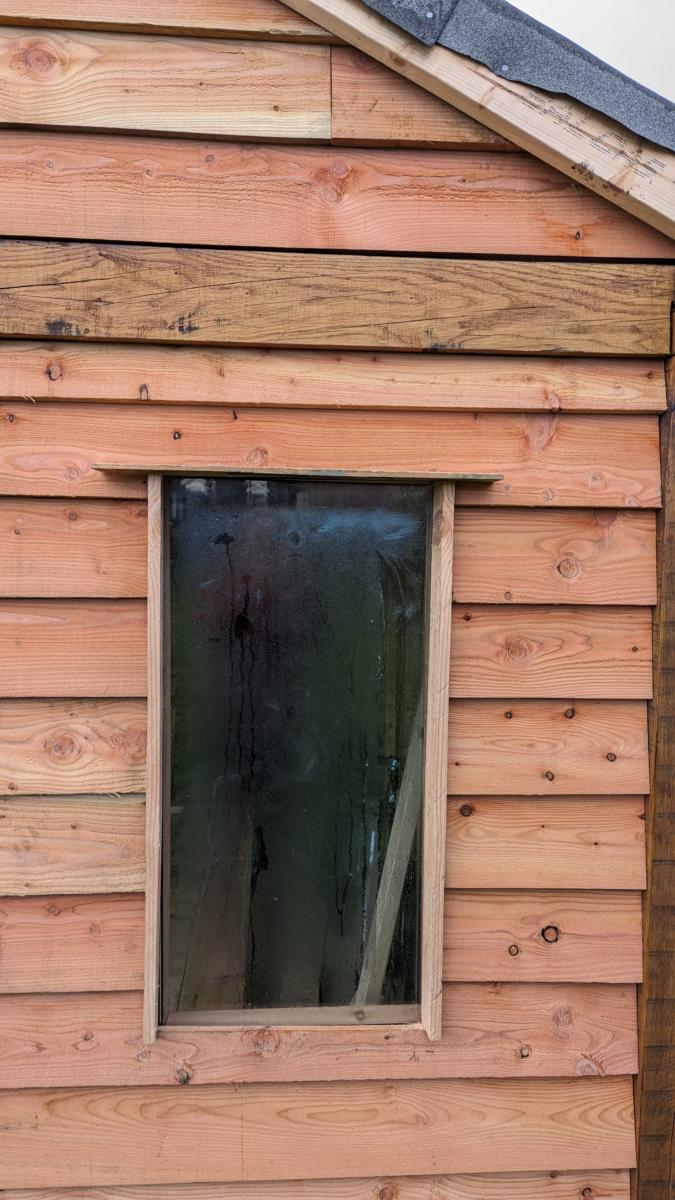
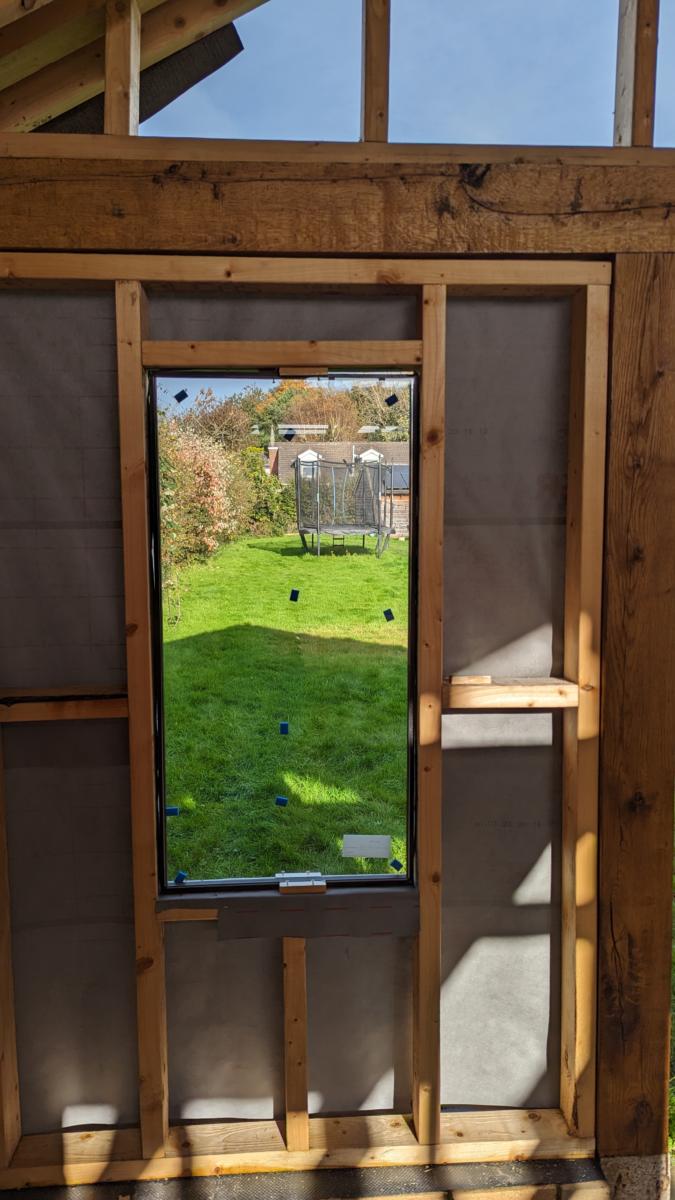
I quite enjoyed doing around the windows…it was easy!
Doing the top bit of the cladding, above the oak beam, was a bit tricky. I had to cut angles on each side to tie in with the shape of the stud walls and the roof beam. I then had to climb up on my platform and pin them in. The very top ones were put in using a ladder. The only good thing about it was as the cladding got higher up the frame it was also lighter to carry.
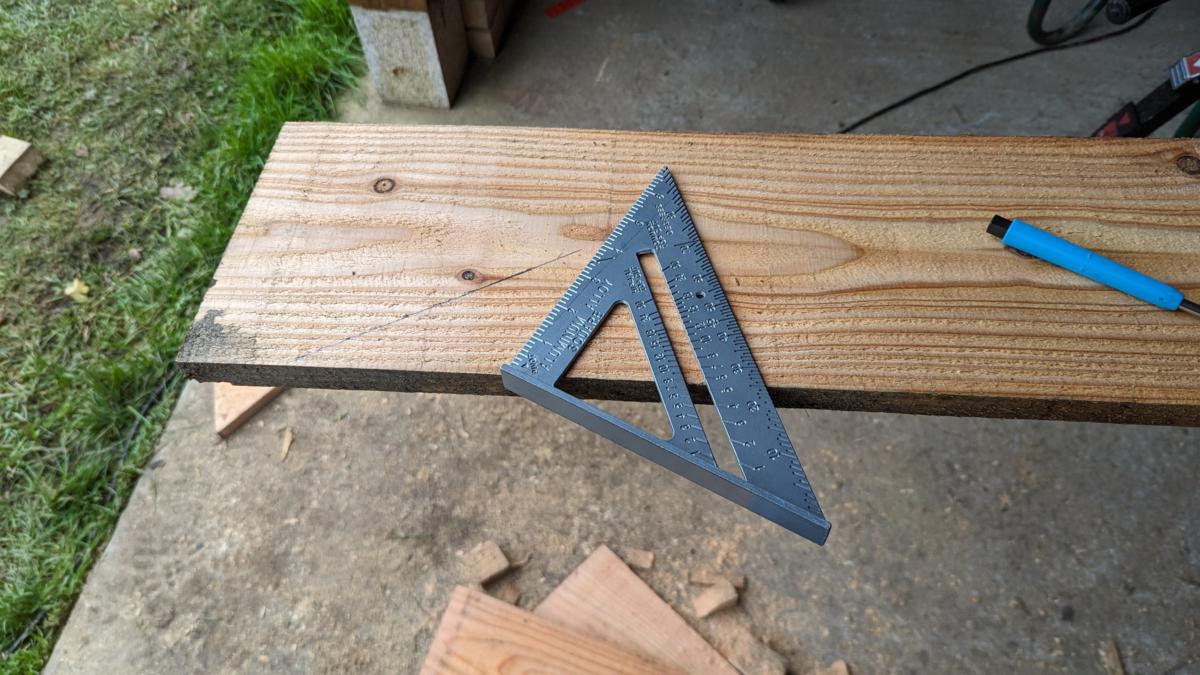
When I first started this project I cut almost everything with a table saw. It’s safe, accurate and pretty easy. By the end I was a dab hand with my angle measuring thing above and a skill saw. Went so much faster and there’s so much more flexibility in the cuts one can make.
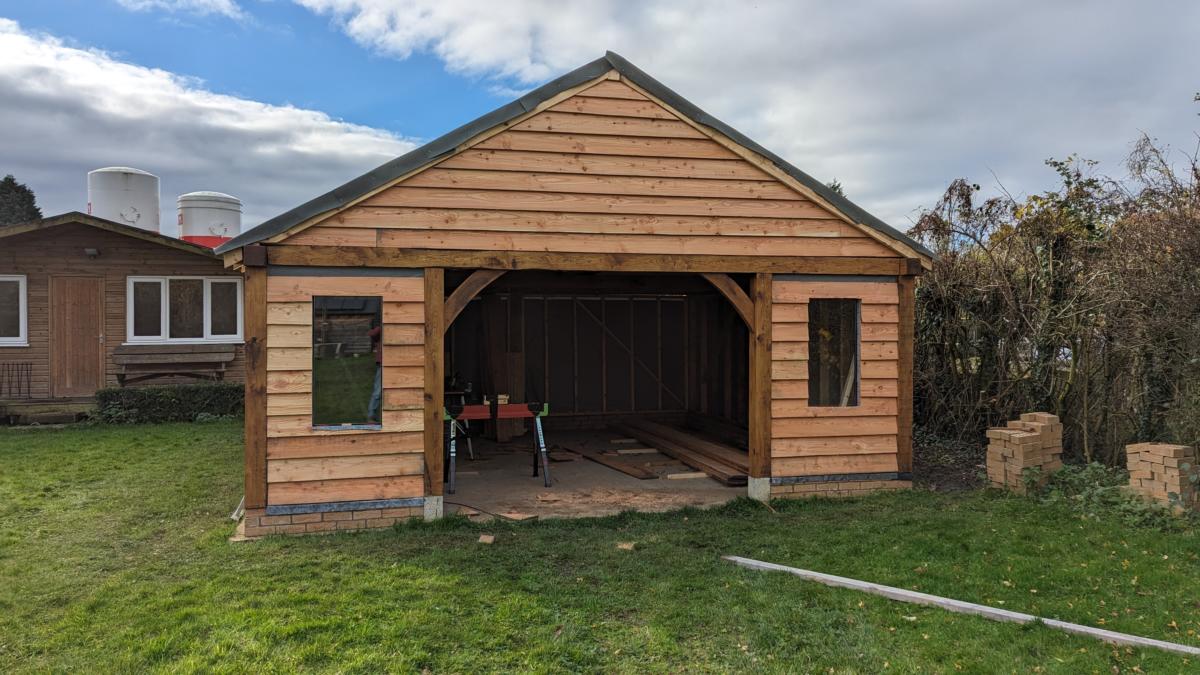
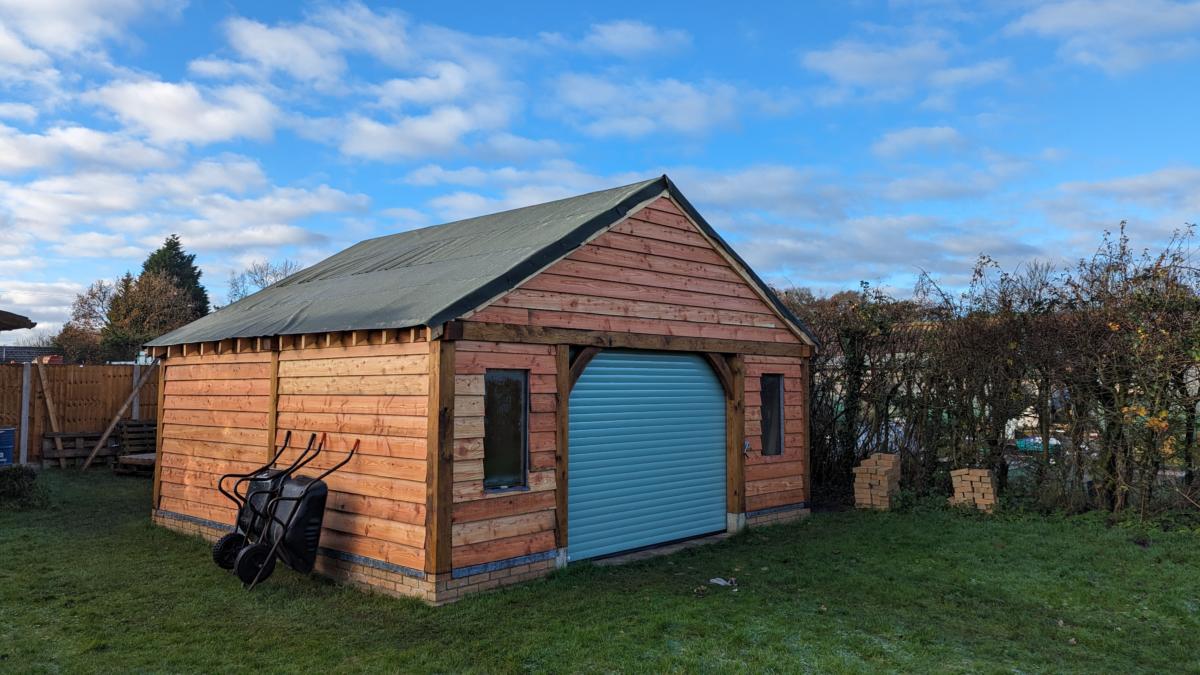
I looked into various garage door options. The one that stood out to me was Crocodile. They’re not the cheapest out there by a long way but they do seem to be the best. They sent somebody around to inspect the site. They sent another fella around to properly measure up and work out all the details and finally they sent out two fine fellas that did the installation. Fortunately we could mount the door on the back of the frame so we managed to get past the problem of my door not being quite square which is something I was worried about. The garage door fitters even pointed out why I’ve been having scuffing problems with the doors on my garage and told me how to fix it.
The end result…
Secure and water tight.
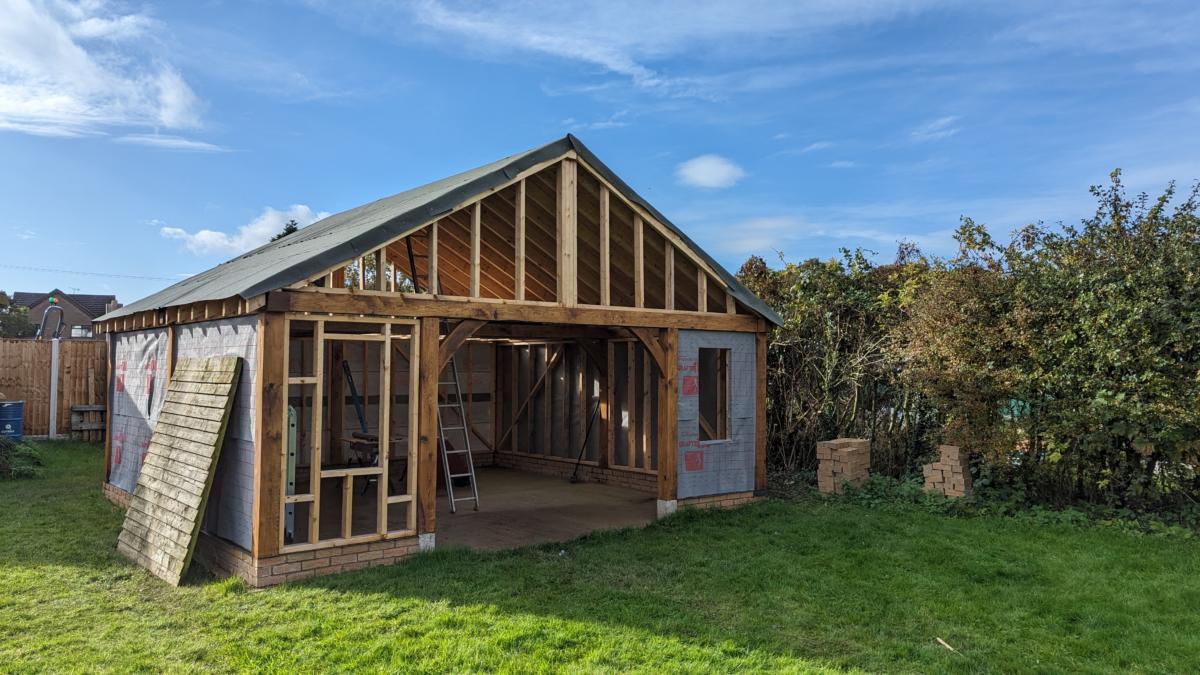
It’s still very much a work in progress. I need to add some fascia boards to the front and back. I need to add guttering down the sides and some downpipes into a soakaway. Need to fit a wood burning stove in there and also seal/paint the floor. Then I can start filling it with toys! But the happy point now is that I can sit back and wait for the weather to warm up before doing all that kind of stuff.
Given that it was starting to get cold and that the slates were working out incredibly expensive aaaaand I had six rolls of felt in my garage I decided to buy some OSB and felt my roof to get me through the winter.
Here it is with all the OSB up and the beginnings of a pretty bad bit of felting being done. Getting the OSB and felt up was very hard work and I couldn’t have accomplished it without the help of Oli.
After finishing the felting I took the waterproof membrane and started stapling it over the stud walls.
The next step was putting the windows in. The windows were bought off eBay for £70. I just chose the windows that were the cheapest and in roughly the size that I wanted then I built the stud walls to fit the windows.
This was about the time storm Ciaron made an appearance so I started running around the workshop and tacking fence panels up to protect the membrane. I also added some batons to the membrane up high in the triangle bits to keep everything intact. As I write this it’s all still in place and the cladding should arrive in 2-3 weeks to “finish” the outside.
I have my own nail gun. It’s a little one for doing quite small jobs like pinning T&G to the outside of the OG shed, maybe a light bit of furniture work or attaching a skirting board. What I needed was a kick ass nail gun capable of firing 90mm nails into a rafter and holding up the roof of my new building.
Fortunately – as always – Hodgsons had one.
This is by far the best tool I’ve ever hired. It’s heavy, it’s loud it’s dangerous. It’s just every man’s dream.
I was almost sad when I had to return it to the hire place. Fortunately I’ll probably rent it again when it comes time to putting the cladding up. I could use a hammer but at £24 quid for a days rental why would I bother with a hammer?
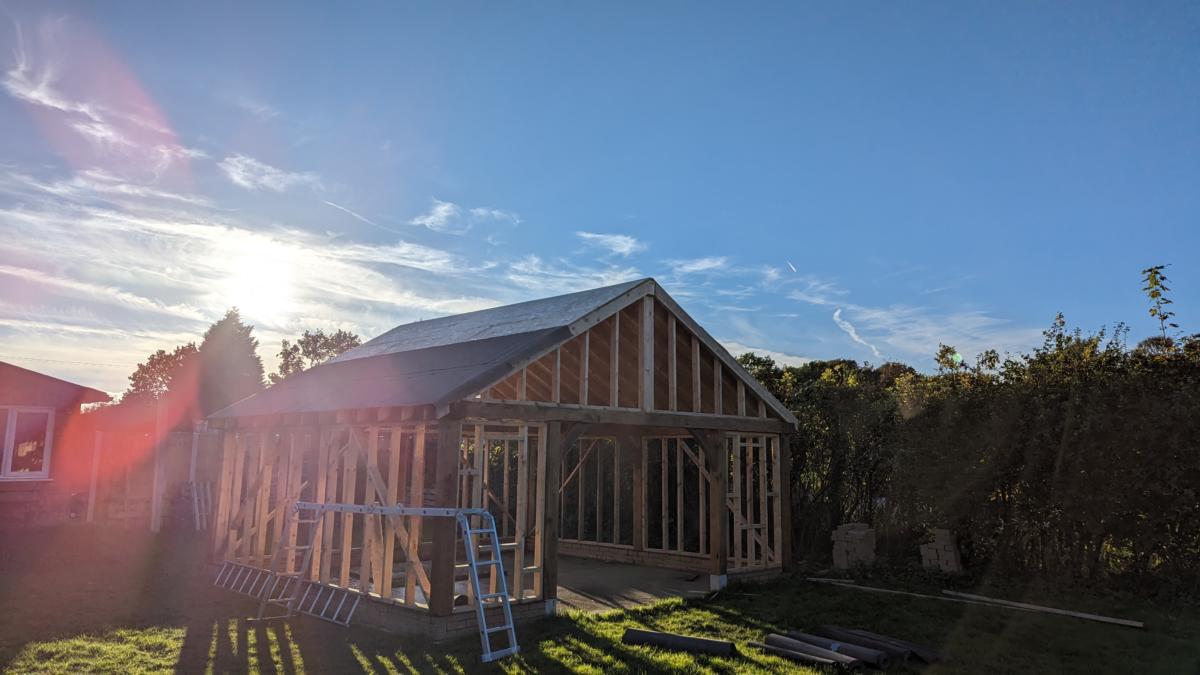
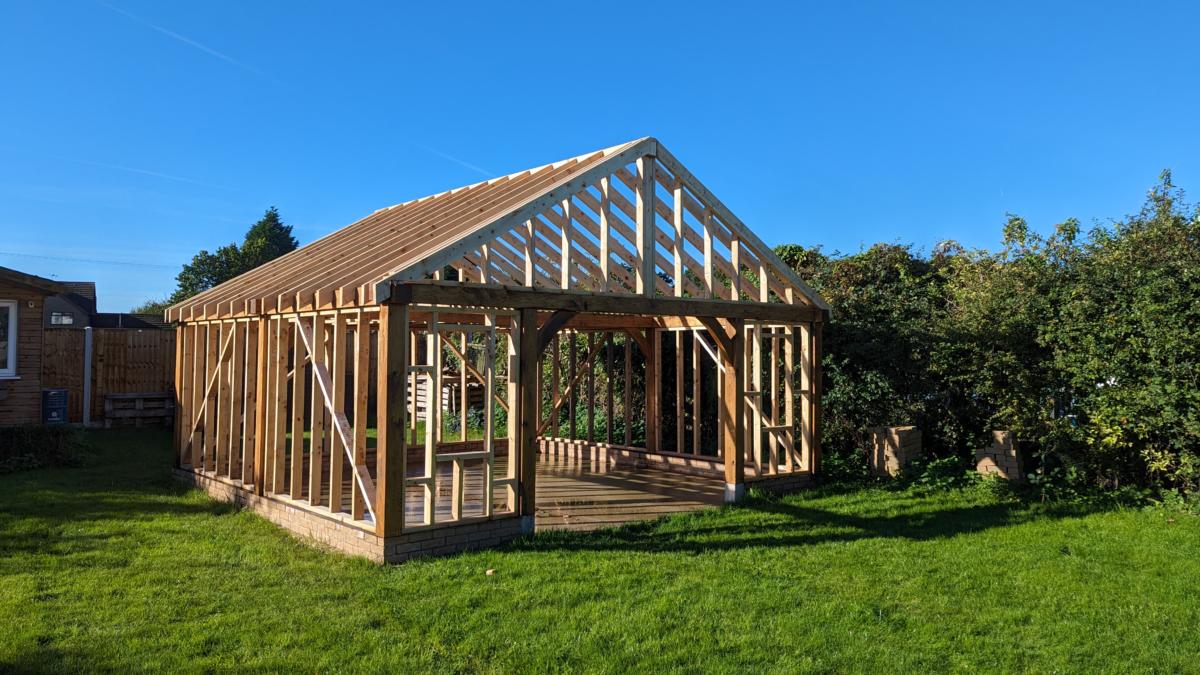
Coming along nicely. All the stud walls are in, the ridge beam is up and all rafters are in place.
The next step will be to put a roof on. One option is a membrane followed by shingles or slates. The other quick and cheap option is to temporarily put some OSB up and felt it, then next Summer do a proper job. After that I’ll have to put a membrane on the walls and then clad to entire building in either Oak, Larch or Cedar.
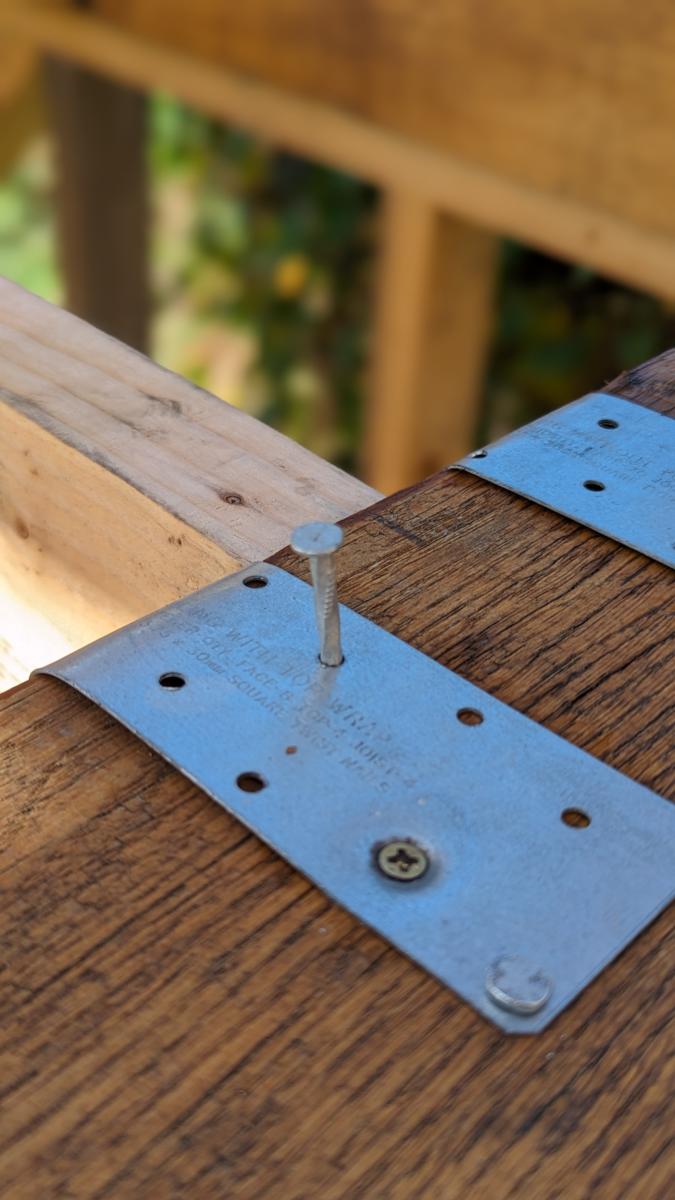
I used some rafter hangers to put up the mezzanine in my new workshop. Initially I just fixed them in place with some 40mm 3.5 screws. However on the rafter hanger was written to use square twist nails. Being a bit of a novice at this I’d never heard of square twist nails so I decided to investigate.
I bought a couple of bags from my local hardware store and set to it.
They are an absolute thing of beauty. They twist as you hammer them in and everything! Those rafter hangers are not coming out again!
As part of helping out at the cubs one of the other parents had the bright idea of making a bunch of nesting box kits that the kids could then put together to make a finished work of beauty. I volunteered to help him in his workshop and we had a day of messing about with scarily big machines by the end of which we had ten nesting boxes ready to be assembled.